

Heroku was one of the go-to hosting providers for most of our backend projects, but since they have phased out their free tier in 2022 most of the people are looking for alternate ways to deploy their backend project. While there are a lot of free hosting providers available out there, I recently came across Railway when I had to deploy one of my Node-Express-MySQL-based app. One thing, I liked about Railway (and I am sure most of you will like it too) is that you don't even need to save your credit/debit card details when you are starting with their free tier. Of course, you will have to use some payment methods when your app grows and your trial period ends but for most of us, we don't want to save our cards for our hobby projects that we are not very serious about.
With that said, in this article, we will be talking about how can we deploy a Node-Express-MySQL based application on Railway for free without a credit card.
Most of the deployment steps should remain the same irrespective of which tech stack you choose.
Project Overview
Before we get down to the setup, let's understand what exactly we are going to build. We will create a very basic Node-based API for our shopping list, where the API will return an id for the item, item name, and item quantity.
This article is not about creating APIs using NodeJS and therefore I will not go very deep into it but I'll still try to explain most of the steps for you to follow along.
Prerequisites
To get along you must have git installed and a GitHub account setup as Railway uses your Github account for continuous deployment.
If you want to follow along with the development, I am assuming that you already have node-js installed.
Create a basic Node server
The first step towards our project is to create a very minimalist node server that we can run on our local machine.
Let's start by creating a new directory:
mkdir node-mysql-app
Move inside of the project now to initialize a basic package.json file and install a few dependencies and dev-dependencies required to create our application.
npm init -y
npm install express mysql2 cors
npm install -D nodemon
For any Node application to run, we generally need an entry point file which is the root file that gets served to the server, in our case the entry point file will be named as app.js (a very common entry point file name for most of the node apps).
Open the package.json file and create a start script, this script will be used to start our development server and serve our entry point file.
// node-mysql-app/package.json

{
  "name": "mysql-app",
  "version": "1.0.0",
  "description": "",
  "main": "index.js",
  "scripts": {
    // Create a start script
    "start": "nodemon app.js",
    "test": "echo \"Error: no test specified\" && exit 1"
  },
  "keywords": [],
  "author": "",
  "license": "ISC",
  "dependencies": {
    "cors": "^2.8.5",
    "express": "^4.18.2",
    "mysql2": "^3.4.3"
  },
  "devDependencies": {
    "nodemon": "^2.0.22"
  }
}
Now, we have everything set up to create our basic node server, let's create a new file called app.js with the following code:
// node-mysql-app/app.js

const express = require("express");

const app = express();

app.get("/", (req, res) => {
  res.send("Hello world");
});

// Server will listen to port 8080
app.listen(8080,
    () => console.log(`Server is listening on port ${8080}`)
);
Run npm start to start the dev server.
We now have a very basic node server that returns "Hello world" when you navigate to localhost:8080 .
Hosting MySQL DB on Railway
If everything went well and you can see the desired response on your localhost then navigate to https://railway.app/ to create a new Railway account (log in if you already have one).
Once you have logged in to your Railway account, you should see a dashboard like this:
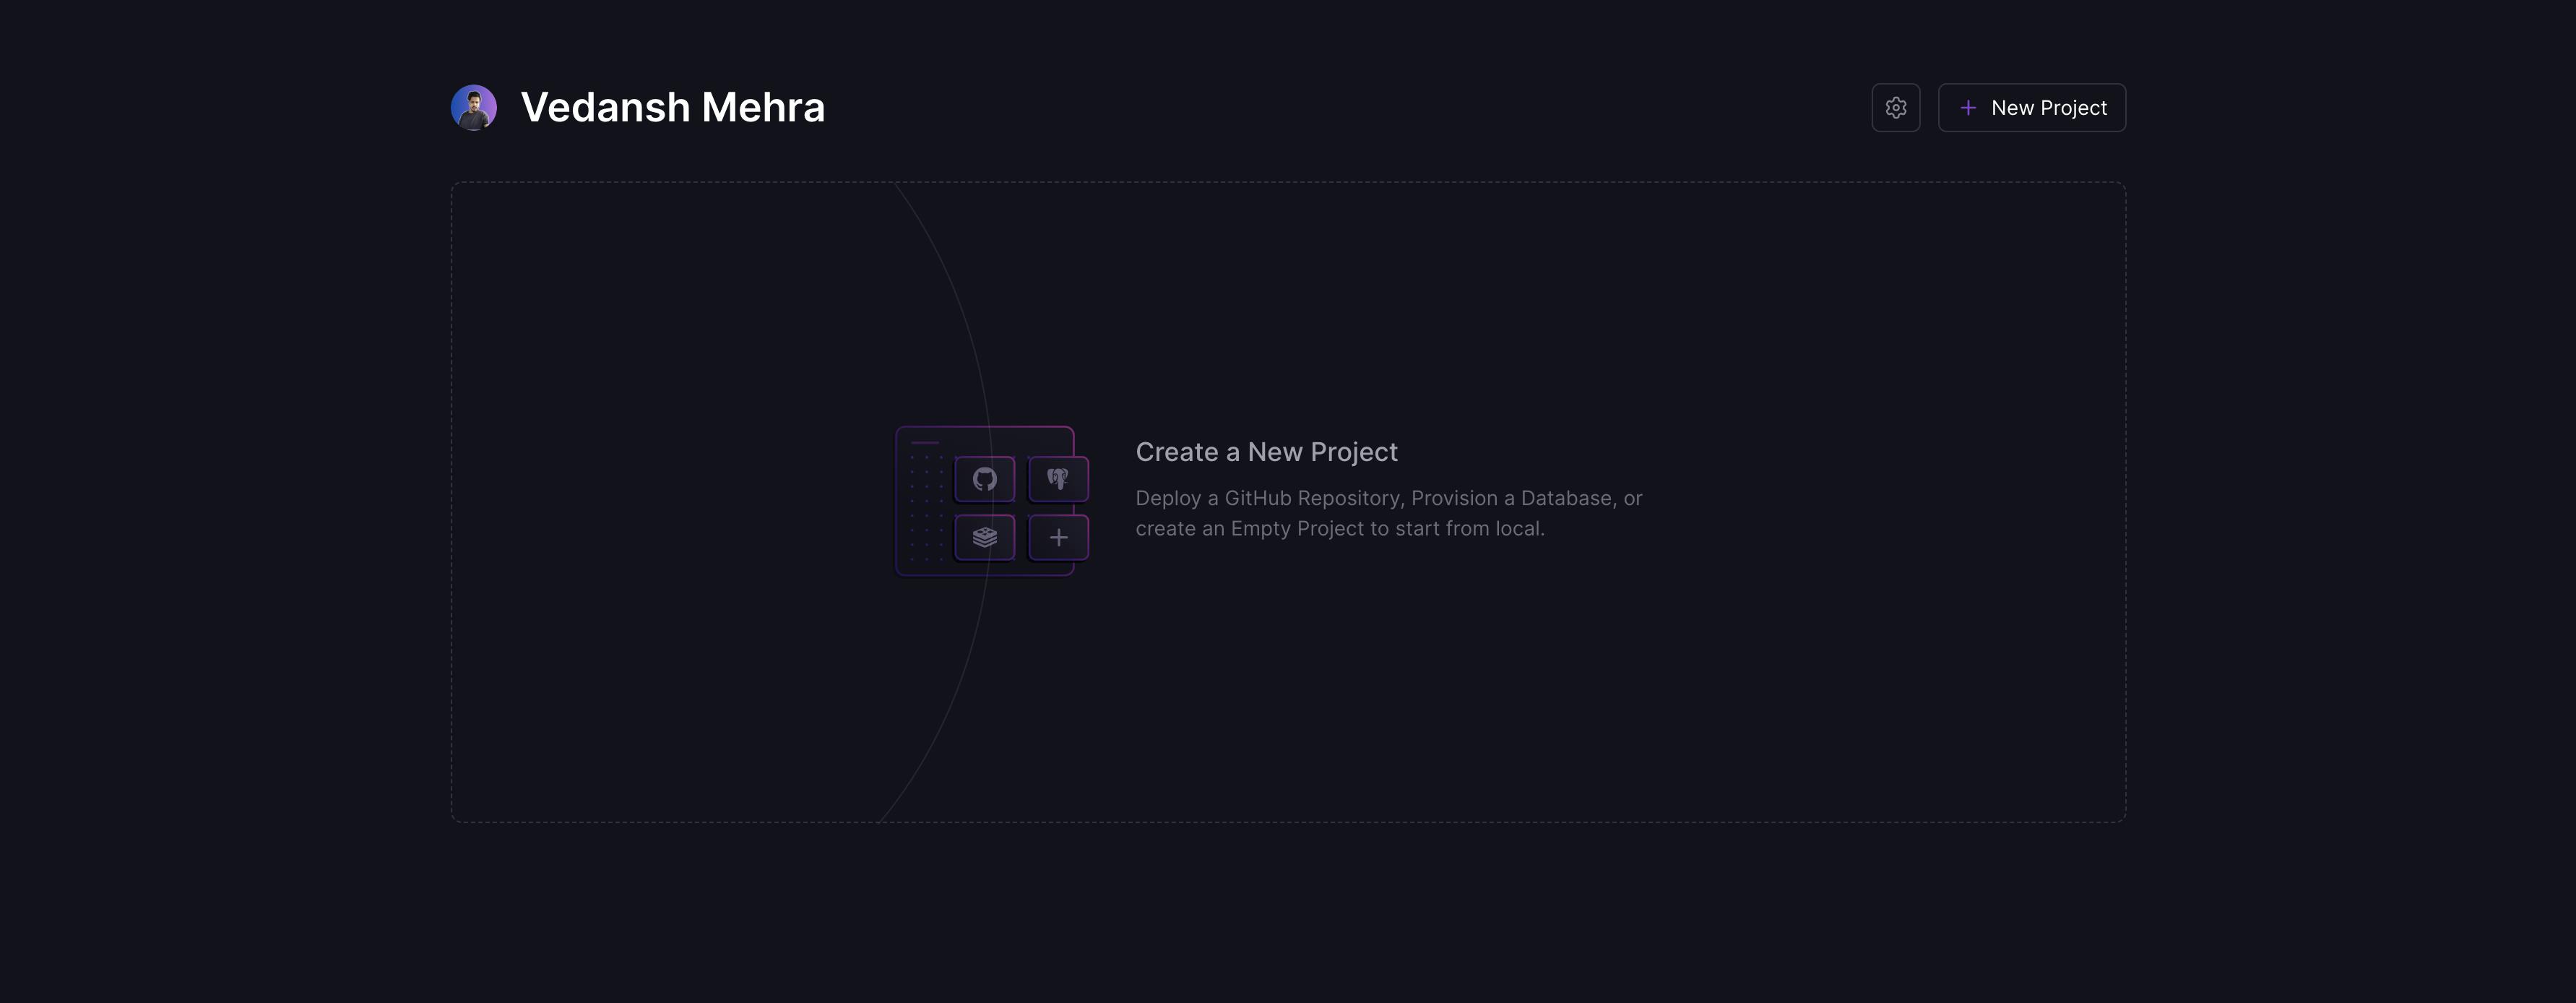
Click on the "New Project" option to create a new project and choose "MySQL" from the given options.
In a couple of seconds, a new instance of a MySQL database should be hosted on your dashboard.
Open your newly created instance of MySQL database and you should see a panel like the following:
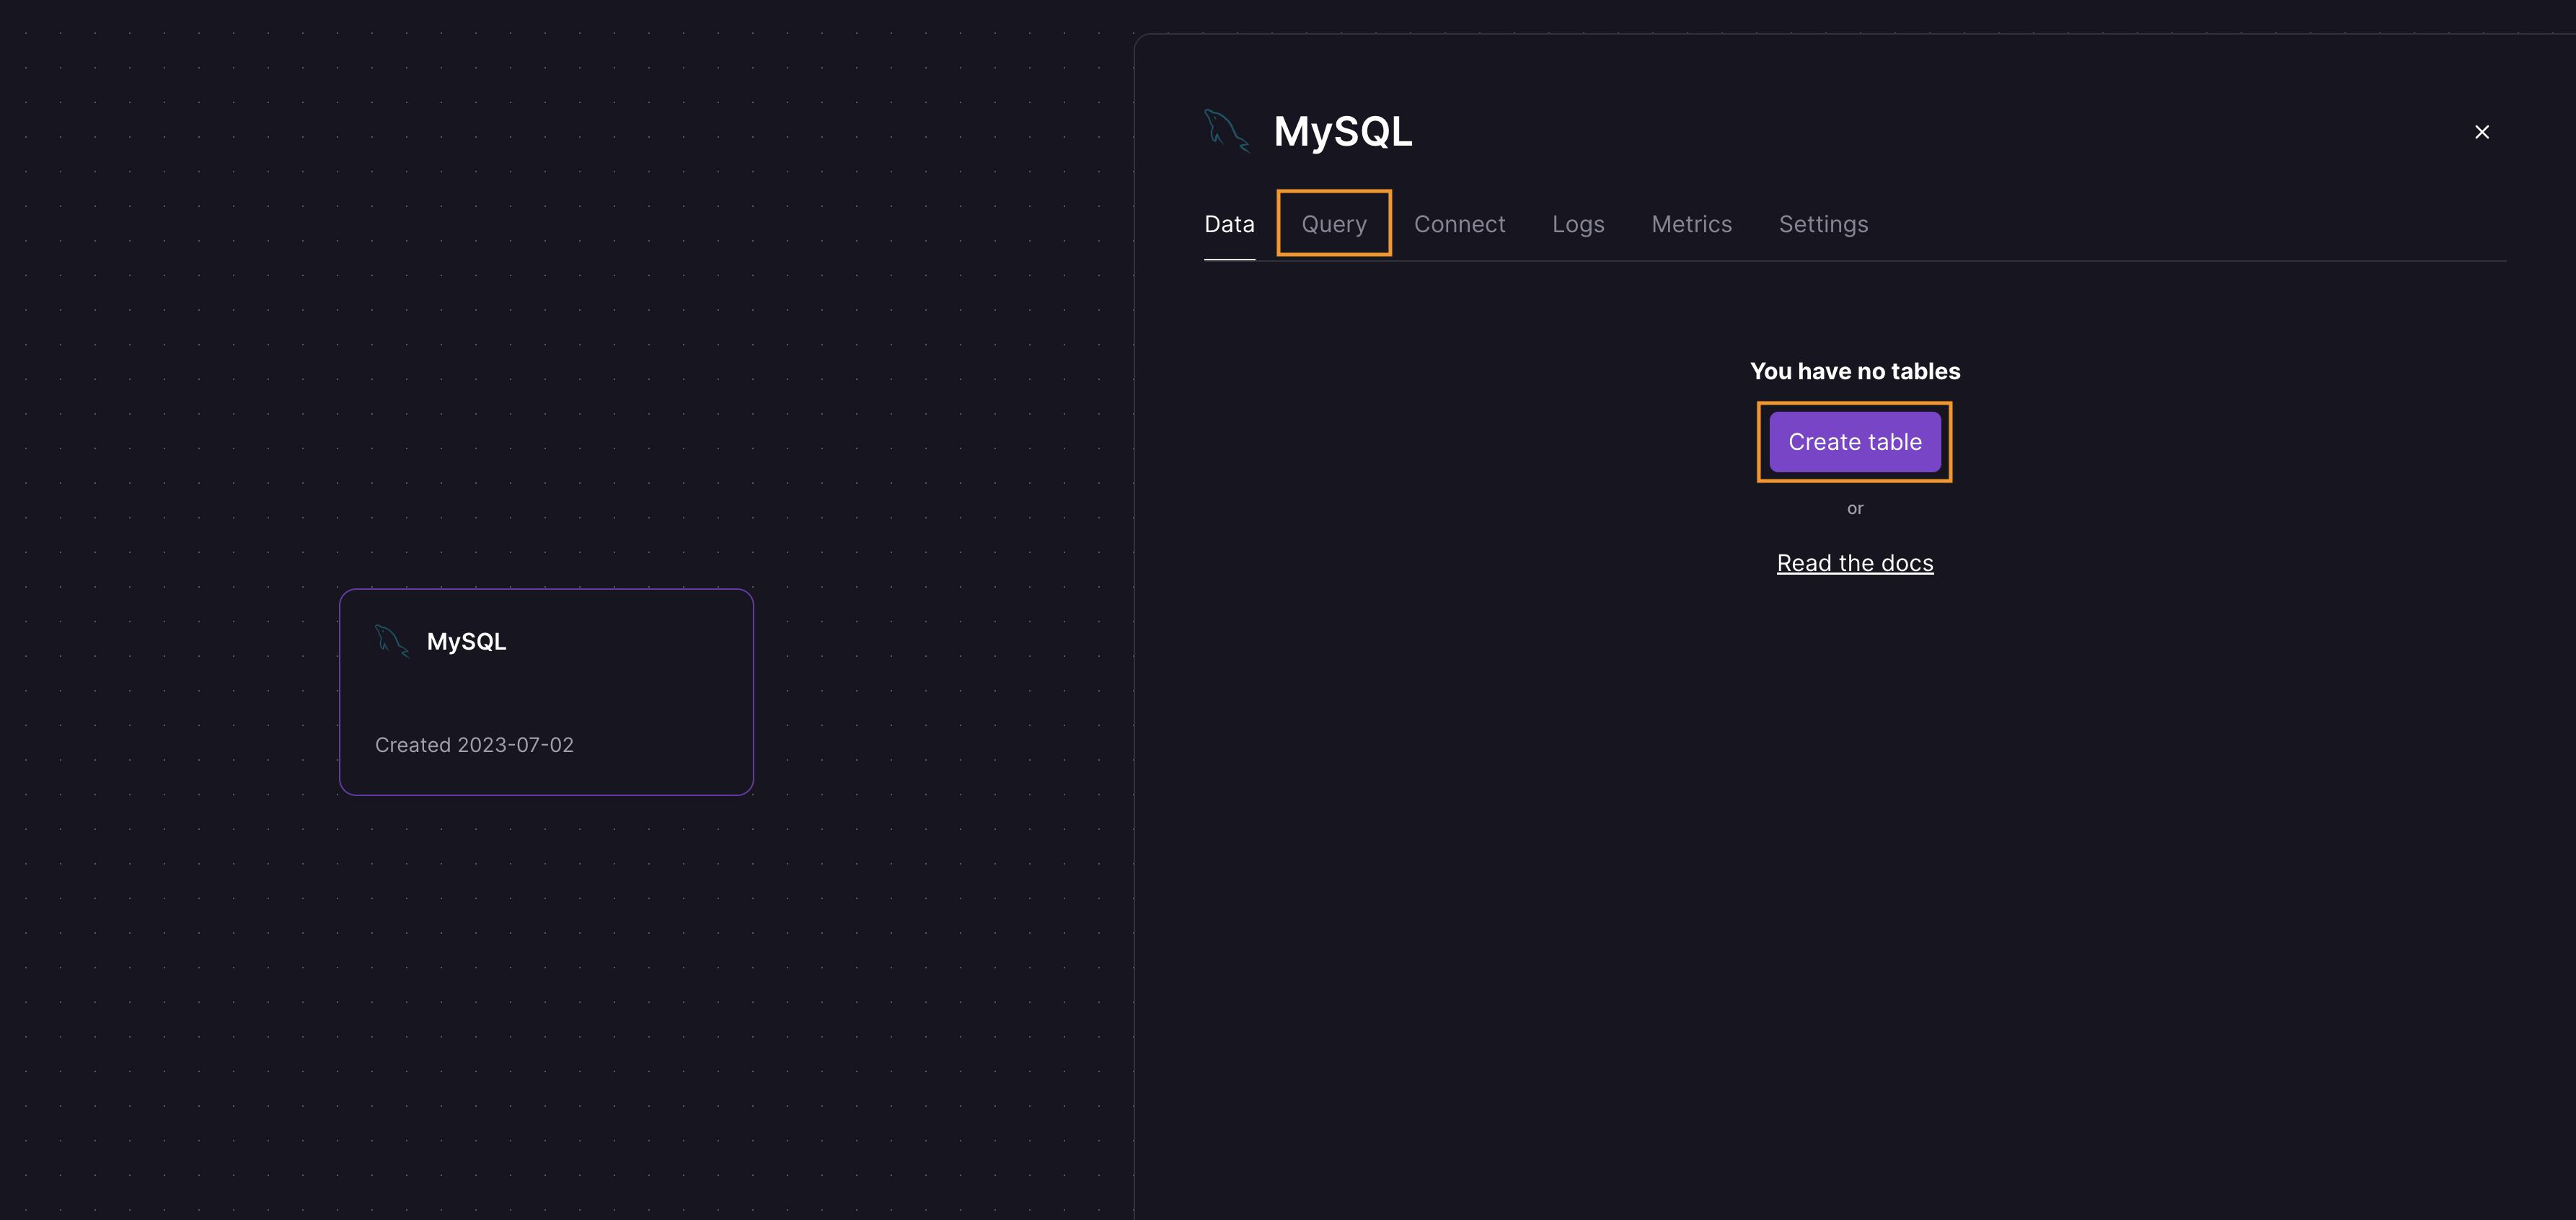
Here, as you can see we have two options to create a new table inside our database. You can either use their GUI to create a new table by clicking on the "Create table" button or you can run your own SQL query to create a table. I'll go with running the custom query but feel free to use GUI if you want to.
So, to create a new table I'll run the following SQL query under the "Query" tab:
CREATE TABLE shopping_list (
    id INT UNSIGNED NOT NULL AUTO_INCREMENT,
    name VARCHAR(255) NOT NULL,
    quantity VARCHAR(255),
    PRIMARY KEY (id)
);
This will create a new table named shopping_list which will have an id, name, and quantity columns in it.
Let's now add some mock data to our newly created table so that we can test that everything is working fine when we will complete our project. To add some data to the table we will run the following query:
INSERT INTO shopping_list (name, quantity)
VALUES
    ('Bananas', '3'),
    ('Milk', '1 liter'),
    ('Eggs', '1 dozen');
Once we have added some dummy data to our table, we are now ready to connect our Node app with our MySQL database which is hosted on Railway.
Connecting Node app to MySQL database
To connect our Node app with the MySQL database, go back to your code editor and create a new file - db.js and add the following code:
// node-mysql-app/db.js

const mysql = require("mysql2");

connection = mysql.createConnection({
  host: // <MYSQL host>,
  port: // <MYSQL port>,
  user: // <MYSQL username>,
  password: // <MYSQL password>,
  database: // <MYSQL database name>,
});
connection.connect((err) => {
  if (err) {
    console.error("CONNECT FAILED", err.code);
  } else console.log("CONNECTED");
});

module.exports = { connection };
Replace the comments with your actual MySQL config variables.
From the above code, you need to replace the commented values with your MySQL config variables that you can find under the "Connection" tab on the Railway app inside your MySQL DB instance. For me, the config looks like this:

While this is enough to connect to the MySQL database there is one problem with the current setup though.
Exposing secret values like DB username and password is not a good practice. To avoid this we generally create an .env file and store the variables there and then read the values from the .env file instead of hard-coding them.
So, let's create a .env file at the root of our app with the following environment variables in it and replace the commented code with your actual DB config values:
MYSQL_HOST=// <MYSQL host>
MYSQL_PORT=// <MYSQL port>
MYSQL_USER=// <MYSQL user>
MYSQL_PASSWORD=// <MYSQL password>
MYSQL_DB=// <MYSQL DB name>
Now to read the environment variables from our Javascript we need to install a package dotenv.
npm install dotenv
Finally, go back to the db.js file and do the following changes:
const mysql = require("mysql2");
// Config dotnev
require("dotenv").config();

// Replace the hard-coded values with the env variables
connection = mysql.createConnection({
  host: process.env.MYSQL_HOST,
  port: process.env.MYSQL_PORT,
  user: process.env.MYSQL_USER,
  password: process.env.MYSQL_PASSWORD,
  database: process.env.MYSQL_DB,
});
connection.connect((err) => {
  if (err) {
    console.error("CONNECT FAILED", err.code);
  } else console.log("CONNECTED");
});

module.exports = { connection };
Now we should be able to successfully connect to our MySQL database. Let's go to the app.js file and create a GET request which will take all the items from the shopping_list table and return a JSON with those values.
// node-mysql-app/app.js

const express = require("express");
const { connection } = require("./db");

const app = express();

app.get("/api/shopping-list", (req, res) => {
  connection.query("SELECT * FROM shopping_list", (err, data) => {
    if (err) return callback(err, null);
    res.status(200).json({
      status: "success",
      length: data.length,
      data,
    });
  });
});

app.listen(8080, () => console.log(`Server is listening on port ${8080}`));
Now, start the server again using npm start and navigate to localhost:8080/api/shopping-list and you should see a JSON returned with the items from the shopping_list table.
Hooray! 🎉
Now as our app is working perfectly fine locally, it's time to deploy our Node server on Railway.
Deploying Node server on Railway
To deploy the application on Railway, we first need to push the code to GitHub. I am assuming that you already know how to push the code to GitHub so I am not going to cover that in this article but make sure that you add .env file and node_modules to .gitignore so that you don't accidentally push these two files on GitHub.
You can read more about the
.gitignorefile here.
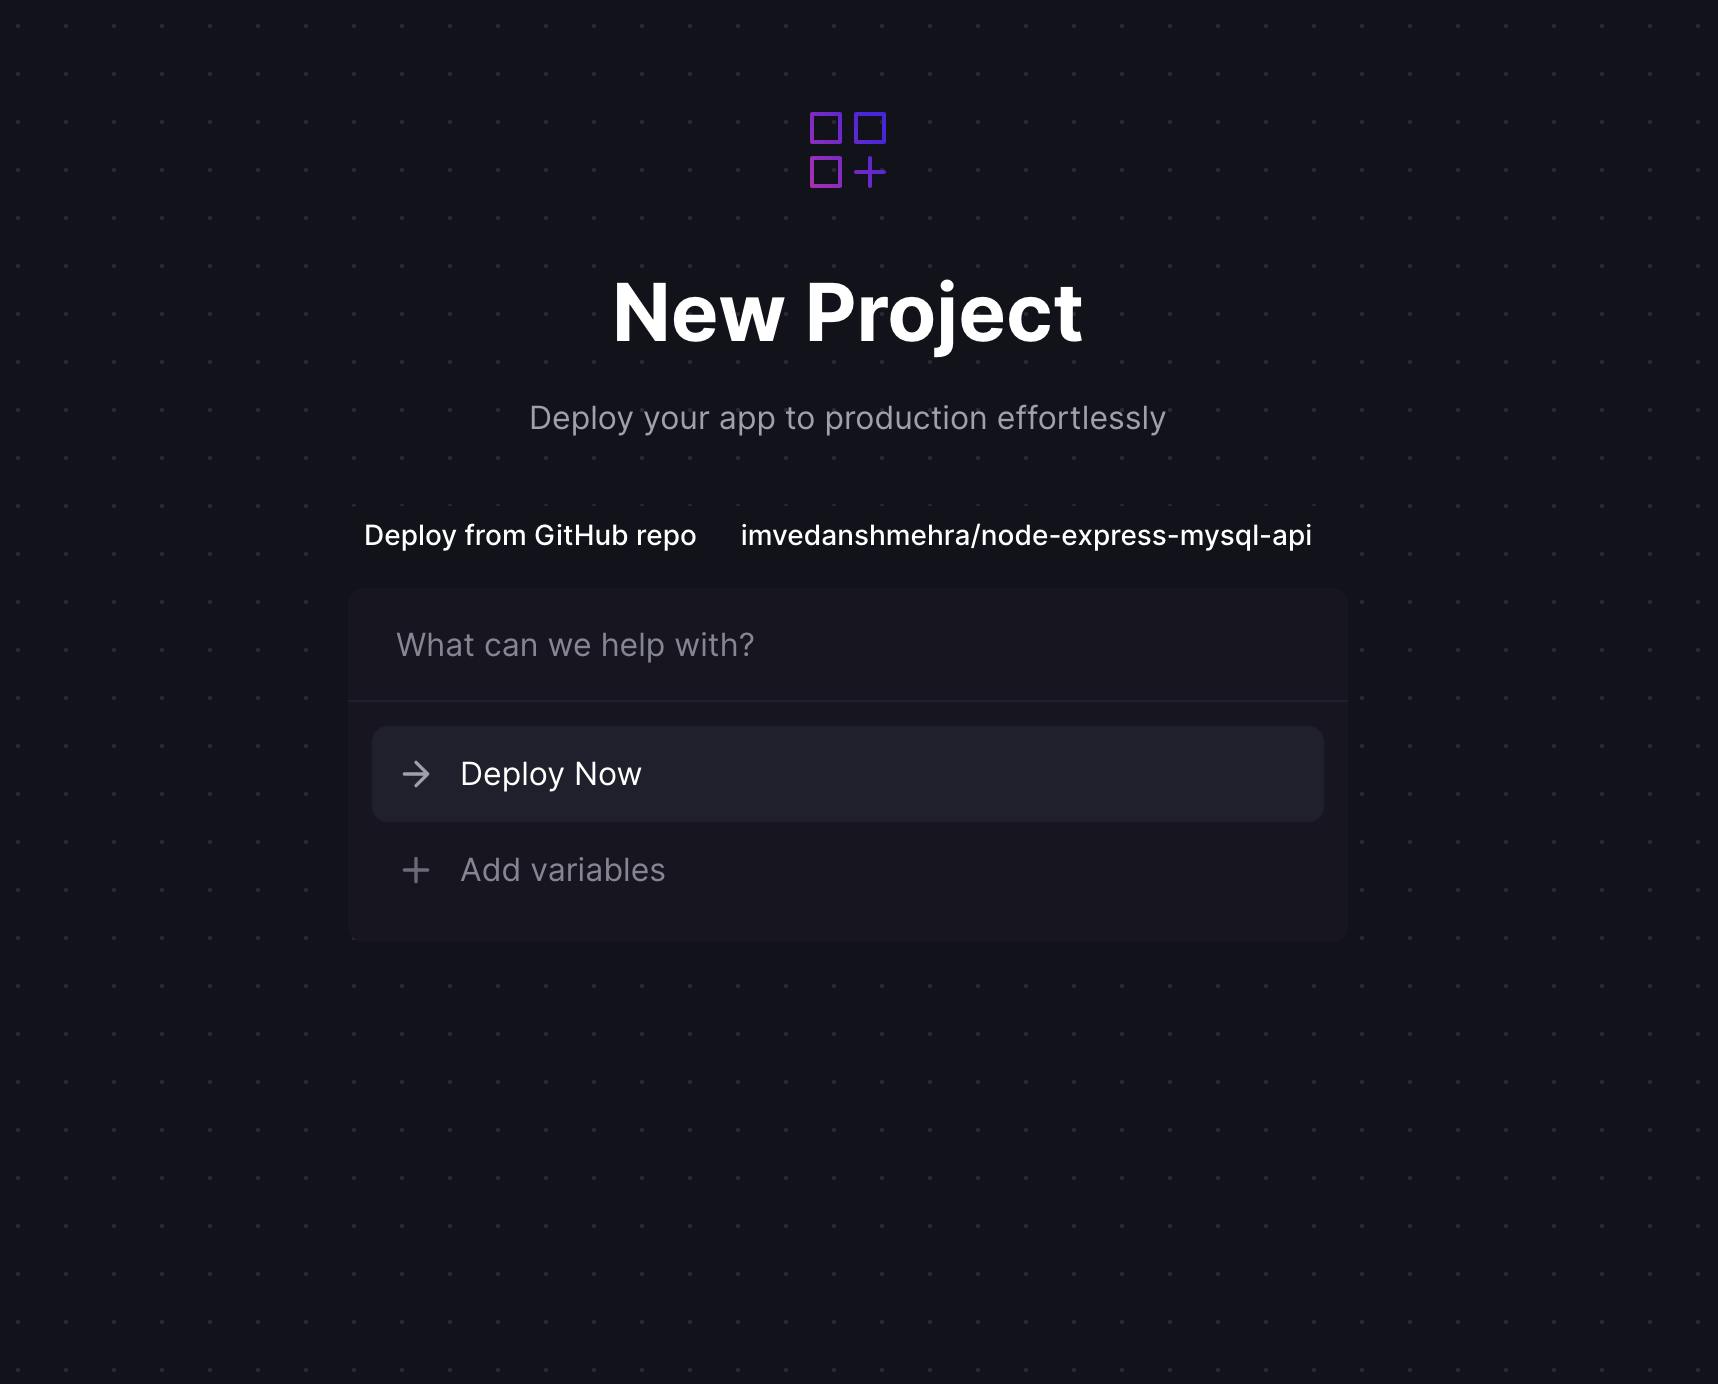
Once you have pushed the code on GitHub, let's go back to the Railway dashboard and create a new project and this time choose "Deploy from Github repo" from the given options.
You will have to connect your GitHub account to the Railway app for continuous deployment of the project.
Choose the project that you want to deploy from all the projects in your GitHub account and then click on Deploy Now.
That's it! Your app is all set for the deployment and now all you need to do is add the environment variables that are needed to run the application.
Go to the "Variables" tab to add the environment variables where you will get two options. You can either add the variables 1 at a time or you can add multiple variables at once using the Raw editor.
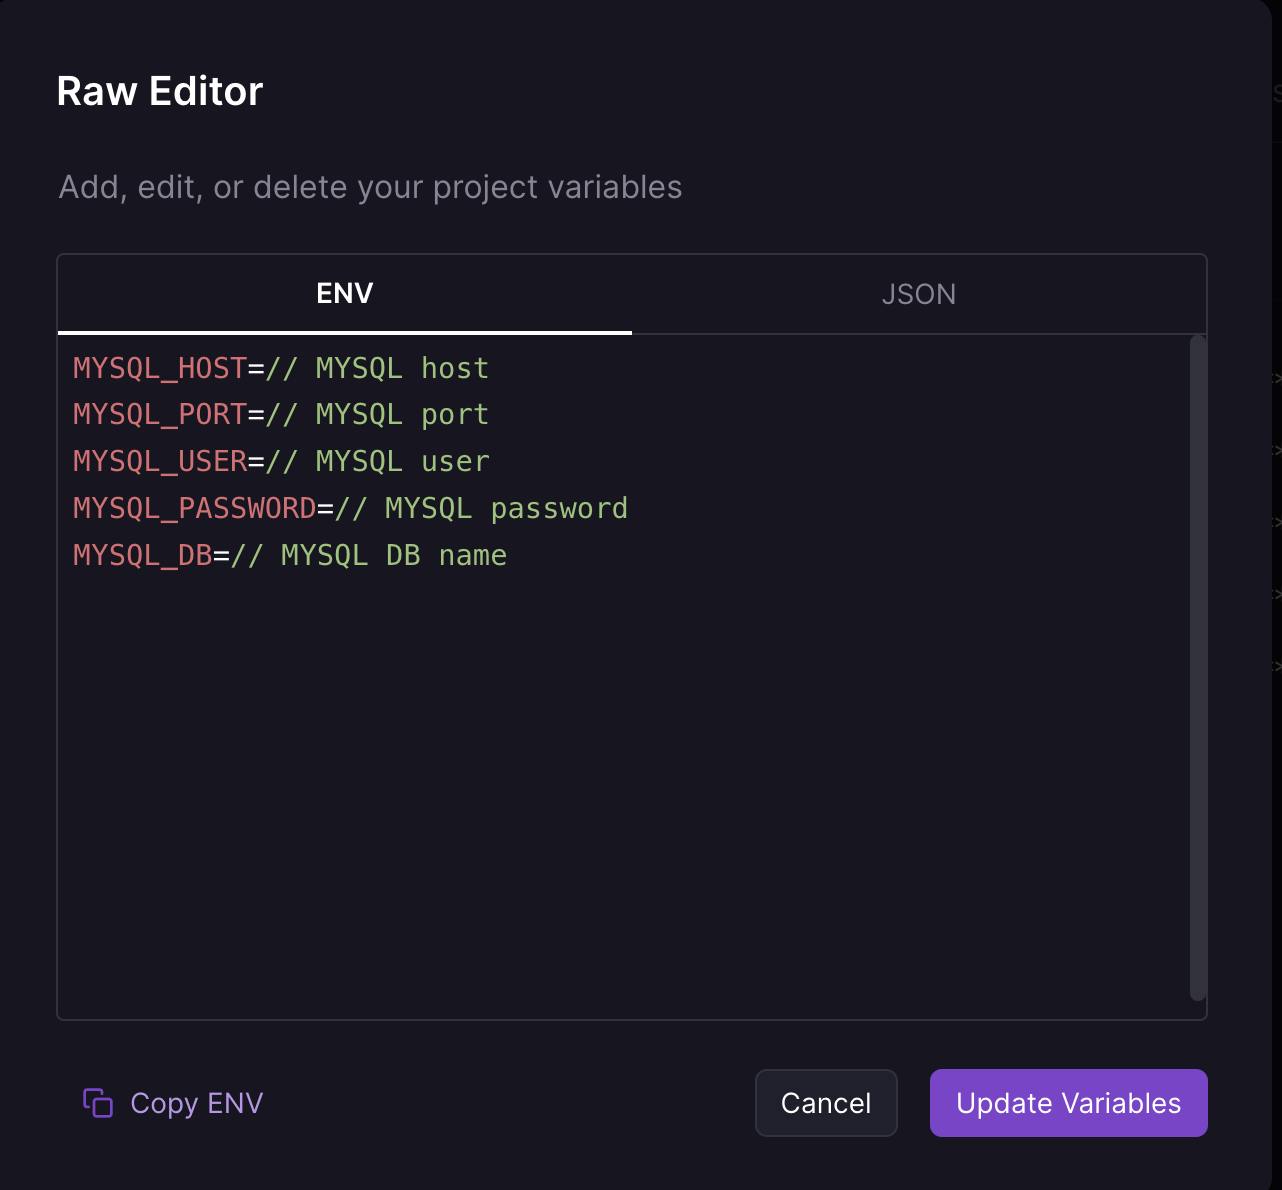
Make sure to replace the commented values with your actual MySQL config variable values.
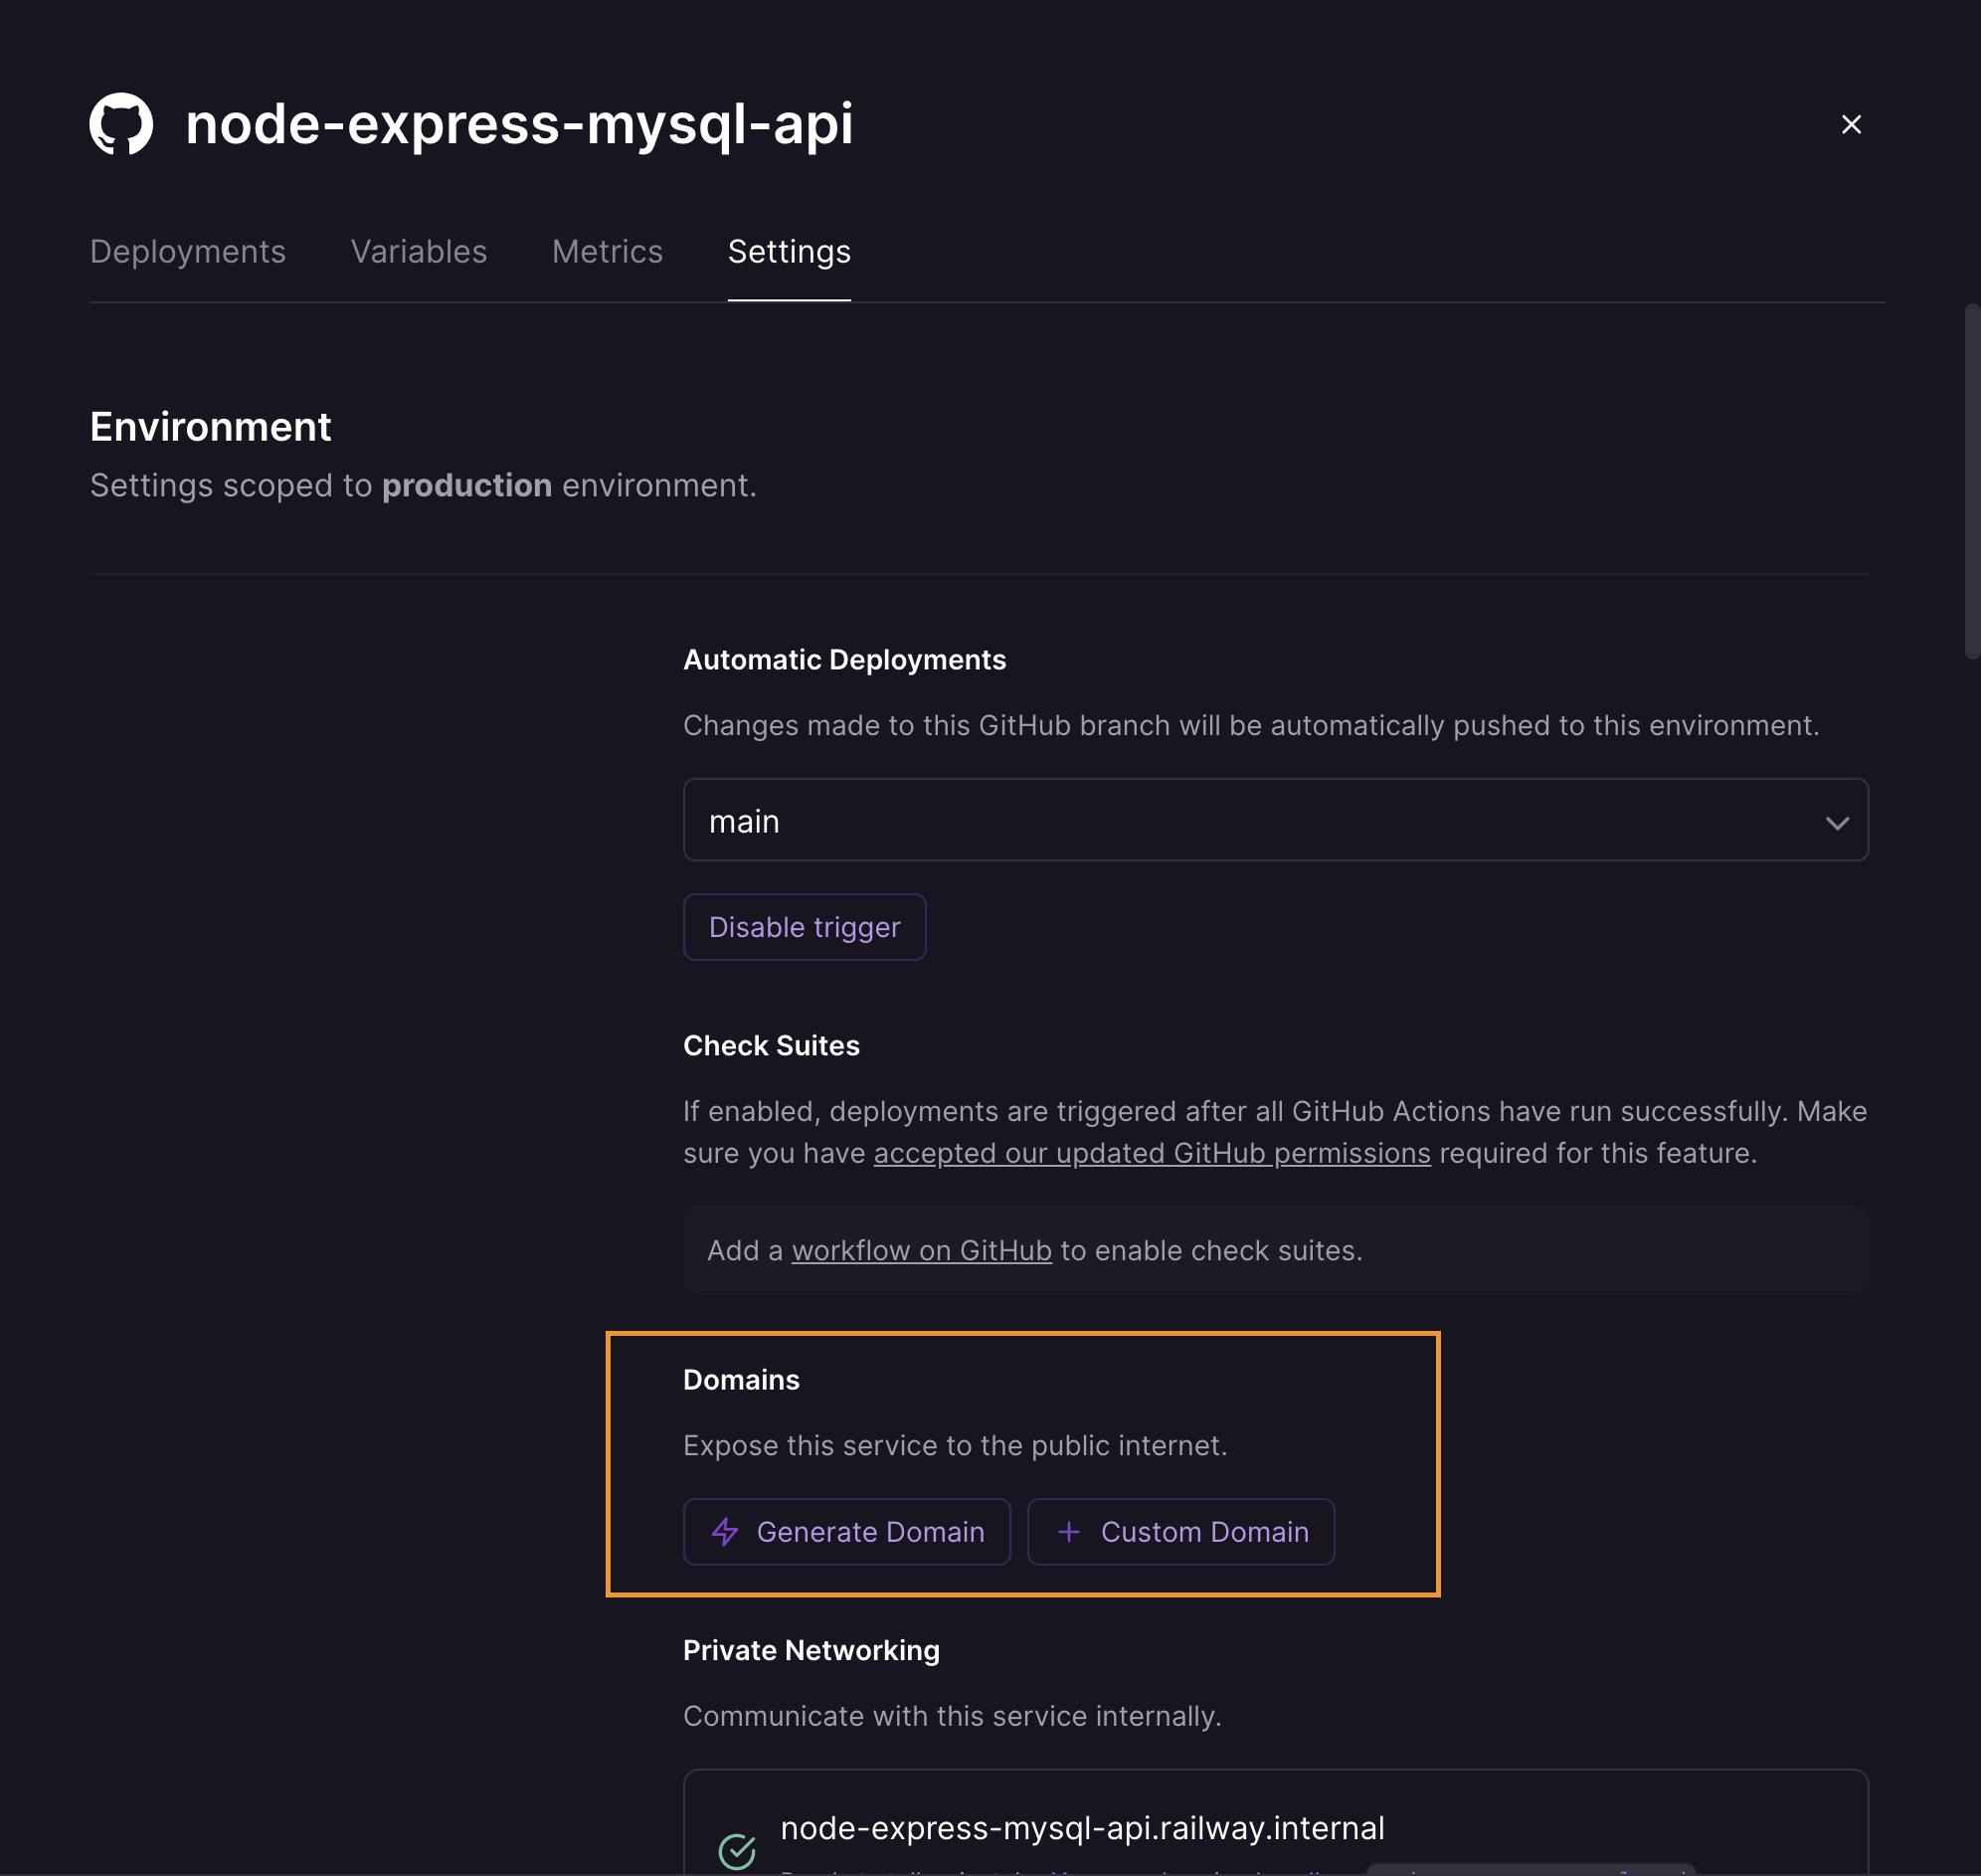
We are done with all the steps needed to deploy the application on Railway. Finally, we will have to either generate a random domain name which is provided by Railway, or select a custom domain if you already have one.
Go to the Settings tab and under Domains you should see the two options, I don't want to use a custom domain so I'll go with Generate Domain to generate a random domain name.
We are all done. 😮💨
Now navigate to your <domain-name/api/shopping-list> and you should see your application live running on the Railway server.
Final Notes
Though Railway was a very good fit for my requirement and it might fit with your requirements as well yet I am quite new to it and I might not be very well aware of its trade-offs or how compatible it is for large-scale applications. I will keep this blog updated in case I find anything about it.
Also if you liked this article please show some love to it and follow me on Twitter where I share more content about software engineering and web development.
Thank you for reading along, see you in the next article. 👋