Monorepo setup with Npm Workspaces & Lerna

Software developer, teaching others how to write better code.
Monorepos lets you manage multiple repositories into one single repository but managing and publishing them can be very tedious as the repositories grow.
Lerna is a powerful tool that can be used to manage and publish monorepos in Javascript/Typescript projects.
Lerna is a fast, modern build system for managing and publishing multiple JavaScript/TypeScript packages from the same repository.
In this article, we will see how we can set up a monorepo with Lerna and Npm workspaces.
If you are interested in setting up a monorepo with Vite, Pnpm, and Typescript you can check out my previous blog here.
Why use Lerna?
To use monorepos well, you need a good monorepo tool, and Lerna is exactly that. Lerna is fast, widely used, and battle tested.
Monorepos can have tens if not hundreds of packages, and managing all of them together can become very difficult. Lerna can rescue us in this situation by doing the heavy lifting of managing the tasks in different packages, versioning, code deployment, etc.
Lerna has some great in-built features which make managing monorepos surprisingly easier.
Running tasks within multiple packages: Lerna gives us an out-of-the-box solution to run tasks inside multiple packages together using
lerna runcommand. For example, Let's say you have 3 packages inside your monorepo and you want to run thetestscript for all of them, with Lerna all you have to do is just runnpx lerna run testcommand from the root of your project and it will run thetestscript inside each of your packages (You must have defined thetestscript in package.json for all the projects respectively in order to make this work properly).Visualize the workspace: When the workspace becomes very huge it is common for a new developer to face difficulty in understanding the hierarchy of the workspace and understand how different packages are linked together. Lerna uses
Nxto help visualize the workspace graph. Simply runnpx nx graphand it will launch a project visualization graph on your browser.
You can check the complete list of Lerna features here.
Who uses Lerna?
Lerna is being used by many different teams including but not limited to:
Jest
Create React App
Nx
NestJS
Project Setup
Prerequisites
To follow along, you must have Node installed in your system which I am assuming that you would already have. Other than that, some basic knowledge of Javascript/Typescript and React will help in understanding the code that we are going to write.
Project Overview
For the sake of this article, our monorepo will have two packages:
common: A shared library that can be used by multiple packages.
client: A basic React app that will consume the
commonpackage and will render the components on UI.
Getting Started
Let's start off by creating a new directory at your desired location.
mkdir npm-lerna-monorepo
Then, move inside your newly created directory and initialize a Lerna workspace.
# npm-lerna-monorepo
npx lerna init
This command will do the following things:
Create a
package.jsonfile if it is not already present and addlernaas a dev dependency.Create and configure a new
lerna.jsonfile.Configure npm workspaces inside
package.json.Create a
packagesdirectory that will contain all our monorepo packages.
├── lerna.json
├── .gitignore
├── package.json
└── packages
Now, in order to use Typescript in our project, we need to install a few dependencies at the root level.
npm i typescript @types/node -D
Once the above dependencies are installed, create a common tsconfig.json file that will be extended by all the other packages of our app.
{
  "compilerOptions": {
    "module": "commonjs",
    "declaration": false,
    "noImplicitAny": false,
    "removeComments": true,
    "noLib": false,
    "emitDecoratorMetadata": true,
    "experimentalDecorators": true,
    "target": "es6",
    "allowSyntheticDefaultImports": true,
    "sourceMap": true,
    "moduleResolution": "node",
    "lib": ["es6"]
  },
  "exclude": ["node_modules"]
}
Now we can start creating our packages, to do that let's go inside the packages directory and create the common package first.
npm create vite@latest common --template react-ts
We should now have a common package inside our packages directory, now let's move inside the common directory and run npm install to install all the required dependencies.
# npm-lerna-monorepo/packages/common
npm install
In order to use the base Typescript configuration that we've defined at the root level, we need to add the following snippet at the beginning of our tsconfig.json inside the common package.
// npm-lerna-monorepo/packages/common/tsconfig.json
{
  "extends": "../../tsconfig.json",
  ...
}
We will now go ahead and create a Button component and will export it so that it can be used by the other packages in our monorepo.
// npm-lerna-monorepo/packages/common/src/components/Button.tsx

interface ButtonProps {
    buttonText: string;
}

const Button = ({ buttonText }: ButtonProps) => {
    return (
        <button>{buttonText}</button>
    )
}

export default Button;
Now export this Button component from main.tsx file which will be our entry point.
// npm-lerna-monorepo/packages/common/src/main.tsx
import Button from "./components/Button"

export { Button }
We will set main.tsx as our entry point by setting the main property in package.json
Also, as per the common workspace naming convention of monorepos we'll change the name of the common package to @npm-lerna-monorepo/common
// npm-lerna-monorepo/packages/common/package.json
{
  "name": "@npm-lerna-monorepo/common", // Change the package name
  "private": true,
  "version": "0.0.0",
  "type": "module",
  "main": "./src/main.tsx", // Define the entrypoint file
  ...
}
We should now be able to import components from the common package very easily after linking it with the client package.
Let's now create our client package, for that we'll move inside the packages directory and run the following command:
# npm-lerna-monorepo/packages
npm create vite@latest client --template react-ts
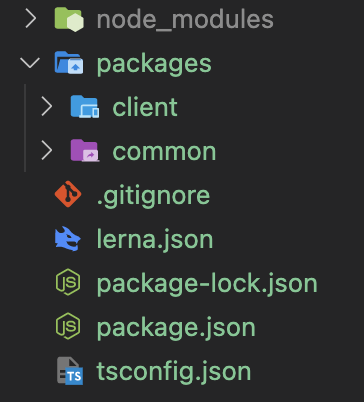
Our project structure after running the above command should look somewhat like this:
Let's update the tsconfig.json of the client package now to extend the base Typescript configuration that we've defined at the root level.
To do that add the following line of code at the beginning of client/tsconfig.json :
// npm-lerna-monorepo/packages/client/tsconfig.json
{
  "extends": "../../tsconfig.json",
  ...
}
Now add the common package as one of the dependencies for the client package, we can add the common package using the name that we've defined in its package.json file.
// npm-lerna-monorepo/packages/client/package.json
{
  "name": "@npm-lerna-monorepo/client", // Updated the name
  ...
  "dependencies": {
    "react": "^18.2.0",
    "react-dom": "^18.2.0",
    "@npm-lerna-monorepo/common": "*" // Added common package
    ...
  },
We've also changed the name of the client package according to the monorepos workspace naming convention.
Let's link both of our packages together by running npm install from the root level.
# npm-lerna-monorepo
npm install
This will link both packages together and now we can easily import the Button component from the common package and use it in our client package.
// npm-lerna-monorepo/packages/client/src/App.tsx
import { Button } from "@npm-lerna-monorepo/common"

const App = () => {
  return <Button buttonText="Hello world" />
}

export default App;
Run the dev server for client package now.
# npm-lerna-monorepo/packages/client
npm run dev
Open localhost:5173 on your favorite web browser and you should see a button rendered on the UI.
So we have successfully setup up our monorepo using Npm workspaces and Lerna and while you are in our local environment, any changes you will make to the common package will immediately reflect on the client.
Hooray 🎉
You can find the complete code of the setup here.
Conclusion
In this article, we have seen how we can set up and manage a monorepo with Lerna and Npm workspaces.
Though Lerna is a great tool, you don't need to include it in all of your monorepos it's mainly suitable for large applications where you have multiple packages that you need to manage simultaneously.
While this article was majorly focused on the setup part, if you are interested in reading more about how we can use Lerna to build and publish our monorepos please let me know in the comments.
I hope this blog could a little value to you. If you liked it please share it with those who might find it helpful and show some ❤️ to the article.
You can also follow me on Twitter where I post more content on Javascript, React, Software Engineering, and other stuff.


